Agnes Caruso Photography

Photography

Welcome to Alice


1 Comment

The Heart of Australia

Welcome to Alice

Alice Springs is the heart of Australia. A place I always wanted to visit ever since I traveled with my finger through the World Atlas. I pointed to Alice on the map and asked my father what is the name of this town. Yes, I could not read yet, but that did not stop me from browsing the atlas and dreaming of traveling around the world. When I finally stepped in Alice many years ago it was everything I expected and more.

So why is Alice special? It may have never been there if it was not for the telegraph lane being build from Indonesia via Darwin to South Australia to connect the new colony to Britain and the rest of the world. But this is history and does not explain why the place feels special. As you drive from the airport into town you pass through the Heavitree Gap. A narrow gate like opening in the mountains – the MacDonnell Ranges. The narrow pass includes, the road, railway track and the Todd River. This narrow gap is like a doorway into a different world, you step from the harsh desert outside to a green oasis of town. While the town is not really as much of an oasis as one may think, it is definitely sheltered from the desert. You have now stepped into a different reality, a town like none other.

View of Alice

View of Alice Springs from the Anzac Hill

Alice is surrounded by the MacDonnell Ranges and that limits the winds in the town making the weather this much hotter. If you think the river can cool you down, think again! Todd river bed is RFDSdry most of the year. It only fills occasionally and then it is frequently flowing way too fast for you to enjoy a quick dip. In fact, the Henley-on-Todd Regatta held in Alice is a not exactly what you may think a regatta should look like. It is a dry river regatta, the only one in the world with boats being carried by the participants. And the boats are of all shapes and forms, including bath tubs re-used as boats. Alice Springs is definitely a unique town, culturally diverse and rich in history. It even made its way to pop culture when a movie “The Adventures of Priscilla, Queen of the Desert” was released. It has also been described by Nevil Shute in his book “Town like Alice”.

History of European settlement started with the building of the telegraph station. At the time the town was called Stuart and became Alice Springs in 1933. An integral part of Alice Springs and the Australian outback is the Royal Flying Doctors Service (RFDS) and School of the Air. While in Alice you can visit the RFDS museum, School of the Air and the Telegraph station, three places of great importance to this region of Australia and the entire outback area.

You also need to realize that Alice is situated nearly in the center of the continent with one road going South to North from Adelaide to Darwin. There is a train which can take you from Adelaide to Darwin – The Ghan. It is definitely an experience to travel across the continent and on the only train route crossing the desert. However, most of the commercial transport nowadays is done by using the road trains. When you leave Alice to drive to Yulara you may see a few of them pass you in the opposite direction.

So now let’s travel a little out of Alice and into the the desert out there. We will visit Uluru, Kata Tjuta and Kings Canyon.

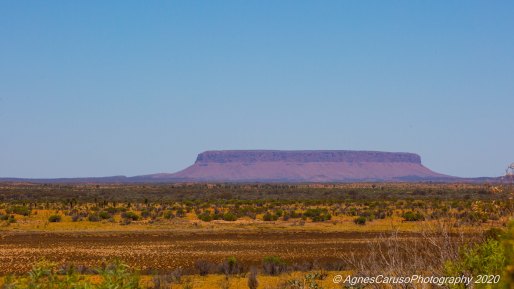
Uluru also known as Ayers Rock is a place you are likely to have seen in images from Australia previously. The big rock monolith in the center of Australia is, however, not the only one. On the way to Yulara you will pass Mt. Ebenezer and Mt Conner. Both are very different in appearance and Mt. Conner is also known as Fool-uru as tourist traveling to see Uluru think that this is the rock.

Fool-uru or Mt. Conner Uluru

Uluru climb has been officially closed when we visited the area in October 2019. This ended up the long lasting problem the climb caused for the local Indigenous people, who consider it a sacred site.


There are photography restrictions around the rock aimed at protection of the sacred sites. One of the most interesting things to do around Uluru is the base walk which takes you along most of the rock. As you walk along the base trail in the morning you will witness a sunrise over the desert, amazing light on the rock as sun raises even further. Shapes of the rock are fantastic, there are also many colors visible on some of the rocks. It is an amazing place allowing you to relax but also think about how you connect with nature.

Bushfires are a part of Australian life and we have seen a lot of evidence of recent fires in the area. This was all before the huge bushfires started later in the year. Nature, unlike human settlement and agricultural sites or wildlife recovers pretty quickly. As you can see above a fire burned only along one side of the road.

While Uluru is a single rock, Kata Tjuta or Olgas is a collection of domes with interesting and sometimes strange shapes. There are walking trails leading in between the domes and also along the base of some of them. I like Kata Tjuta more than Uluru, it appears more dramatic and mysterious as you get closer to it.

This trip included a visit to Kings Canyon, a location a bit off the beaten track but extremely interesting due to it geology and very unique appearance. The different types of sandstone created a very unique appearance of the canyon. The colors are highlighted by sunlight as it reaches the bottom of the canyon towards mid-morning.

As our trip is slowly ending with a drive back to Alice, no trip into the Red Center will be complete without a picture of the red sand and the road leading across the desert to Uluru.


If you enjoyed this trip into the heart of Australia, you may also enjoy “The Heart of Australia” photo book I created from this trip. You can also purchase some of the prints from this book from my Pixels website. I hope you enjoyed the trip to the center of Australia.

Not yet sure where I will take you next time, but if you have an idea what you would like to see, leave a comment here or on my Instagram account. See you again in a little bit somewhere around the world!


Leave a comment

How to overcome challenging times?

The past year was a difficult one with many things happening for me all at the same time. With a few moves around the country writing was not high on my list of things to do. However, as we headed into the year 2020, little we knew it will be an even more challenging year and this time for all of us around the world. It has been now just over a month since I started working from home. While I have a nice office set up the challenge really comes from the fact that we cannot just randomly wander around and meet with friends or family.

An important question on everyone’s lips is how do we deal with the craziness, insecurity, instability and lack of knowledge what is coming in the next few months? What can we do to make the time at home more pleasant or productive? You can ask what do photographers do, when they cannot book portrait sessions, photograph weddings or even travel around to take wildlife and landscape photographs? It is not easy to suddenly stop doing what you love doing and put it aside. I have been going through my images from last year’s trip to Australia and will soon post some beautiful pictures from there. I have also been wondering about the backyard taking pictures so I can to keep my eye sharp and hand steady.

You can also focus on the indoor photography, taking pictures at home to improve your technique. The object is of little significance, focus on what you want to show and how. Maybe what this image can be used for later can give you an idea. an in fact focusing on photo editing, graphic design and preparing the photo books which were always waiting till you managed to get to them. Now is the time to write and edit the books, and include some beautiful images. I have been creating a book from each overseas trip we took and still have a few to make. So if you are patient, they may just be coming soon to Blurb. In meantime, let’s have a look at some of my early images from this year or actually end of last year.

First Night in Boston was cold but it was entertaining and certainly full of beautiful lights. Let’s think about the calm from the start of the year and hope that it will return soon.

And just to tease you for the next installment of the blog coming soon is the image from Central Australia showing Kata Tjuṯa or Olgas. If you are impatient, feel free to check out the book on the  “Heart of Australia”. And if you sign up on my website for updates, there will be some exciting free stuff coming soon to all those who subscribe.

Staying positive, trying to learn something new, read books, explore the world from the comfort of your own couch is one way to at least partly lift your spirits. I found that exercise also helps me to keep mind occupied and my body fit. And then there are all those projects we always wanted to get started, now is as good time as any to look back and see if you can start them. With the next posts I will try to challenge you to get on with something exciting and get creative.


Leave a comment

Story telling with photos – using BookSmart editor from Blurb part 2

Today we will concentrate on the second part of creating the book, finishing it and uploading for publishing.

Let’s start with the cover of the book. There are three different types: soft cover, hardcover with image wrapped on it or a linen hardcover with dust jacket. The only important thing to remember is that not all sizes of the book are available in a soft cover version. Softcover books less than 80 pages will also not have any text printed on the spine.  If you have picked a large size book with only hardcover options and now want to change to a soft cover, you will need to resize your book. Just click on the change size icon and follow the prompts. Changing size may require adjustments of the layouts.

As you can see in this example the dust jacket was created with the title and author on a front page and on the spine of the book. However, title does not appear clearly in the image and font is a bit awkward. This is pretty normal in the first version and it is easy to change to your liking. Changing colors and font may take a few tries before it looks just right. It is easy to reposition the text boxes in Edit Layout just as we did before. If the decisions on text, color and font are too hard to make, you can print a few examples, show the options to family or friends, get a second opinion.

Adding extra text to the flaps or back of the book gives you more space to tell the reader about yourself and the book itself. While text on single color background is not a problem, adding it to a photo with varying colors can be a bit tricky, just like the back page above. Just because the layout allows you to add text, it does not have to appear there at all. As you would have noticed the book pages and the cover are white, there is an option to change the theme of the book to a dark or a patterned one. You can check options under Themes icon. If you do not like it just undo it to return to the previous version.

The next important step it to determine how your title page is going to look like. It can have an image on it or not, there are a few layouts provided. This page can be really creative to stand out or can mirror the book cover, the choice is yours. The following page is a copyright page. As I mentioned it before, when making a photo book it is important that you hold the rights to the images you are going to include in your book. If you are using someone else’s images or graphics or any protected content, you need have their permission and add their names to the copyright page. This is particularly critical when you will be wanting to sell your book.

Laying out the images of the main book content is the real fun. Any beautiful panoramic photos can be used to create a two-page spread. In one of my previous books I used the image of Windows in Arches National park as a spread. It makes a great impact when you open a book. In this book, I used Cliffs of Moher as a center spread.

Another feature, you might have noticed are headers on all the pages of your book. Headers can be easily edited to display content of choice: title, author, page number or custom content. In contrast to trade books, you can modify on which pages your header appears. Any changes to the font of the header have to be applied to either selected or all pages in a book. Page numbers will by default appear in a footer and again that can be edited in the same manner as a header. Inspect your pages and if the header or footer look awkward on a page, like in an example below, you can adjust that by removing the text.

Headers and footers cannot be edited in layout view, meaning their position cannot be altered, they cannot be added or removed. However, not all layouts have a header or a footer. Generally, any full-page images will not display a header and footer. If for whatever reason you want to alter that, select a layout with these features and create a full-page image box on it.

Now it seems that the book is ready for a preview and proofreading. On the right you will see a button to preview book. Once you click on it, a non-editable preview will appear. Now you will be able to see how your printed book will look. It is easy to go back and edit details as you review the book or make notes and then go back and edit all the parts needing attention. There is no right or wrong way of doing it, whatever works for you as long as you manage to catch all the problems.

Things to watch out for:

  1. Position of the images on a page, check which parts will be trimmed. Enable Trim Guidelines if the are off.
  2. Do your images need zoom adjustment to better show the photo?
  3. If there are any photos with a warning sign, this means that the resolution of an image is too low
  4. Check the right hand side of the software window labeled Issues. This triangle turns yellow with an exclamation sign and number of issues if there is a problem. Clicking on it will open up a dialog box allowing you to fix or ignore the problem. All the existing problems will be listed with page number and description.
  5. Remember selecting a font on the cover? You adjusted font size, type and color. Now you need to decide if the font inside the book is what you like or not. Keeping it slightly smaller, if you have lots of writing makes a lot of sense. However, you can also make text a feature by using a special font type, size or color. That said do not go crazy with it.
  6. Just because a text box shows up on a page, does not mean you have to use it. If you leave it blank nobody will ever know.
  7. Photo book is meant to showcase the images, tell the story with the pictures not words. Keeping your text spare and minimal will help you do that.
  8. Once the book seems complete, select preview and make sure you like the appearance of the book, story is what you want to convey. If you feel something should be changed experiment with it, ask for advice.

Once you are happy with the book, you are ready to order it. If you would want to change a size of the book, this is the last time you can do that for a photo book. Any changes of opinion later may mean resizing your content and going through the checks anyway all over again.


After clicking Order Book, a final checklist appears and you can use a spell check at this stage if you have not yet done it before. I strongly suggest to do it as there is nothing worse than printing a book only to find a spelling mistake in it. For those of you who do not have an account on Blurb there will be an option to register. For those of you using an older version of BookSmart, make sure that you upgrade to the latest version. If your version is old, book will fail to upload. Do not panic, close the software, download and install new version, then re-open the book and continue.

Once the book is uploaded you can create an e-book for different devices or a .pdf file which is accessible on nearly all devices. This is also the time to set up book for selling if you wish to do so. This is always possible to enable selling later. I suggest ordering a copy for yourself first to see how it looks all printed out, before setting it up for sales. You can market your book through Blurb, Amazon or Apple iBooks Store. You are not locked to a single distributor and books can be printed on demand, so there is no upfront cost or storage issue with boxes of books. Use Blurb guidelines for setting this up.

I hope you enjoyed making a book! Leave a comment or connect on social media to show off your creations. My book will soon be available as well.


Leave a comment

Story telling with photos – using BookSmart editor from Blurb part 1

The first book that I will show how to create is a Photo Book. I will be creating a book about trip around Ireland. Let’s get started. There will be two parts to this post. In the first one, I will show how to create a book. In the second, we will review book, add finishing touches and upload for printing.

I am using Windows 10 and this is where the images are coming from in my posts. You can use an Apple computer as well for the process, there are also some editors specially for iPad and iPhone. Other software you will need, is an image processing software. It can be anything you like as long as you can create .jpeg or .png files. I use Adobe Lightroom for most of the processing, occasionally also Corel PaintshopPro 2018. You also have an option of importing images from SmugMug.

In Lightroom it is good to create a collection of images you want to use, so picking the ones for the book is easier. This is the most time-consuming part of the creation process. Generally, we have way more images than should be in a book. So how to cut down on this number?

  1. What story you want to tell in your book? Is it about landscapes, architecture, history, friends, family or an event? This should allow you to narrow the number of images.
  2. Which images best represent the story you are telling? Do you want to show images of a historical object with plenty of people or just by itself? Do they show the character of the place you wish to convey?
  3. Pick images that you love for whatever reason. They are obviously important to you. Can you now make a story out of them that will tell someone else something special, show the beauty of the place?
  4. Be adventurous with your images, pick and choose, change them if you want. This is your story, there is no correct or incorrect answer. Play with images, we will be arranging them on pages and you may find that some are better than other in a layout you are creating.

If you created previous books, BookSmart will open the last book created or ask you what you want to do. Select New Book Project, under File in main menu of from the front screen. The first screen will ask for the book title, author and book size. Pick a title, it can be changed later but having a few untitled books on the computer will make things really complicated later. In order to figure out the size of a book and number of pages you want in a book, click on pricing button to see how much a book will cost. Make sure that you are looking at Photo Book pricing as this is what we are creating.

The cover choices available for a selected book format are listed as well. It is possible to select the cover later in the process and you can change your mind up until uploading the book, so do not worry about them right now.

As to the actual book structure and content. In your book of 20 pages, the first page is a title page, second page will be a copyright page and the last page is left empty for the logo. So effectively you will have only 17 pages for your photos and any text you want to add. Depending on price you want to pay for your book you may want to add some more pages or not. If you want to sell the book, a price is also important.

Next step lets you pick an already existing layout or start your book from scratch. I clicked on Start Book Now. This opens-up the editing software on the front page of the cover with information you added at the beginning and this is where you can change it.

On the bottom of the screen is a book navigator. There are two ways of navigating, one on the arrows and the second on clicking the pages you want to edit. Pages can be moved around the book by dragging and dropping them in a new position. New pages can be added from the Add Pages drop down menu. The center of the window is occupied by the book pages. On the left there are alternative layouts and below space for images.

Importing images is not complicated, as long as you know where they are on your computer. Select Get Photos and identify your folder. There you can pick individual photos or import all of them. You can delete any unused images from the import list to clean it up.

As you have noticed the pages of the book show image sections and text sections. The easiest way to make a change to the layout is by choosing a different page layout from the variety of ones already available in the program. If none of them suits you, click on Edit layout and save it as your own with a new name.

Editing the layout is very simple. You can add Image Box, Text Box, resize, duplicate existing containers, bring them to front or send them to the back. The features can be aligned with respect to each other. An important note is that a Display trim guidelines feature should be enabled so no text or image will be layout in a pink area that will be later trimmed.

Now you should be able to make your own layouts and save them so they can be re-used later in your next project.

To Add images to the book, click on the page in book navigator. Once it is highlighted, you can drag the image to the image container. In order to substitute an image, delete it by using backspace and drag a new photo into its place. It is also possible to focus on a part of the image by using Zoom slider. By dragging the image in the container you can select to show just a part of the photo. When adding text, it is better to use a slightly smaller font than you would use in your regular documents. I have usually used 11 point font for main text. Another word of warning, not all fonts are licensed for e-books. At the top of the font palette there are e-book friendly fonts, however, for just printed version you can use any font. There will be time later to proof read a .pdf file to make sure that font is not too large.

It is time to stop now to let you create a book. In the next part we will finish the book and upload it to Blurb. Feel free to ask questions in the comments if you have any.


Leave a comment

Self-publishing with Blurb

Did you ever wonder if the photos on a phone, computer or prints stuck somewhere in an album are all there is to your holiday shots or important family event? The answer is no. You can create beautiful photo book which will tell the story and showcase your images. Such a book can become a focal point of discussing your just finished holiday or can become a great present for family or friends. The uniqueness will make it stand out and be very special.

Now you say that it may be just too hard to make a book, you need special software, it gets too difficult to layout the book…and the excuses keep coming. In the next few blog posts I will show you that it is not that difficult. It takes some time, creativity and ability to pick just some out of hundreds of pictures you took.

Blurb is one of the self-publishing services and it offers a variety of book formats, paper choices and also e-books. They offer their own layout software, in case you do not have access to publishing software like Adobe InDesign or image editing software like Adobe Lightroom.

Thus far I have used their software BookSmart and BookWright. While on the outside there is very little difference between them you cannot publish all the different formats using BookSmart. This software is only good for creating photobooks and associated e-books. BookWright on the other hand can create photobooks, tradebooks, magazines and e-books in multiple formats. The differences between the different publication types are primarily in prices and appearance. In order to make the best choice, it is a good idea to order a swatch set from Blurb. This will show you first hand the quality of paper and color as well as black and white prints.


When making the choice, you should consider first of all why are you creating the book? It is to be just for you? A gift for someone? Or will you be interested in selling it? All those considerations are very important. Especially, when book is intended for sale, you will have to consider the price of the final product.

Let’s look at the general workflow of creating a book.

  1. What tool to use to create your book depends on your experience level, software you have access to on your computer and why are you creating this book. There are many options and if you wish you can hire a specialist to do it for you as well.
  2. I suggest that you download the software you wish to use, either BookSmart or BookWright. Having it on your computer gives you a complete freedom in making changes when and where you wish.
  3. Give your book a title. Do not worry, you can change it later.
  4. Select a number of pages you want to have in your book. A default is usually 20 pages. Again you can add or subtract pages as you wish later.
  5. One important decision best made at the beginning is the size of your book. While it can be converted later, you will create a lot of work for yourself to adjust sizes of images, text and margins. So this you should get correct at the beginning.
  6. There are many layouts available from Blurb, but those are totally flexible and customizable.
  7. Make sure that you have a set of the images you want to use in a handy place. A larger set is just fine, no need to stress over them yet.
  8. If you want to add text, you can create .rtf files or type directly in a book. Again, place any additional files in a dedicated folder so you do not have to search an entire computer.
  9. Remember to use only images to which you have copyright or you have licensed them for this purpose. If using even your friends’ or family’s images always give credit. There is a copyright section where you can do that.
  10. You may be tempted to use an auto-create book feature in Adobe Lightroom. By all means click on it, however, I found it a bit awkward to use.
  11. As Blurb is the publisher, their logo will appear in the book, if you are serious author, you can replace it with your own for a fee. This can be your last decision before submitting the book for print.


Are you now ready to start creating?

If so I invite you to the next installments of my blog. I will take you through some of the details how to create a simple book and tell a story from your holidays. Remember that until you submit the book any mistakes can be fixed, layouts can be changed, titles, page numbers, even the format can be altered.