
The first book that I will show how to create is a Photo Book. I will be creating a book about trip around Ireland. Let’s get started. There will be two parts to this post. In the first one, I will show how to create a book. In the second, we will review book, add finishing touches and upload for printing.
I am using Windows 10 and this is where the images are coming from in my posts. You can use an Apple computer as well for the process, there are also some editors specially for iPad and iPhone. Other software you will need, is an image processing software. It can be anything you like as long as you can create .jpeg or .png files. I use Adobe Lightroom for most of the processing, occasionally also Corel PaintshopPro 2018. You also have an option of importing images from SmugMug.
In Lightroom it is good to create a collection of images you want to use, so picking the ones for the book is easier. This is the most time-consuming part of the creation process. Generally, we have way more images than should be in a book. So how to cut down on this number?
- What story you want to tell in your book? Is it about landscapes, architecture, history, friends, family or an event? This should allow you to narrow the number of images.
- Which images best represent the story you are telling? Do you want to show images of a historical object with plenty of people or just by itself? Do they show the character of the place you wish to convey?
- Pick images that you love for whatever reason. They are obviously important to you. Can you now make a story out of them that will tell someone else something special, show the beauty of the place?
- Be adventurous with your images, pick and choose, change them if you want. This is your story, there is no correct or incorrect answer. Play with images, we will be arranging them on pages and you may find that some are better than other in a layout you are creating.

If you created previous books, BookSmart will open the last book created or ask you what you want to do. Select New Book Project, under File in main menu of from the front screen. The first screen will ask for the book title, author and book size. Pick a title, it can be changed later but having a few untitled books on the computer will make things really complicated later. In order to figure out the size of a book and number of pages you want in a book, click on pricing button to see how much a book will cost. Make sure that you are looking at Photo Book pricing as this is what we are creating.
The cover choices available for a selected book format are listed as well. It is possible to select the cover later in the process and you can change your mind up until uploading the book, so do not worry about them right now.
As to the actual book structure and content. In your book of 20 pages, the first page is a title page, second page will be a copyright page and the last page is left empty for the logo. So effectively you will have only 17 pages for your photos and any text you want to add. Depending on price you want to pay for your book you may want to add some more pages or not. If you want to sell the book, a price is also important.
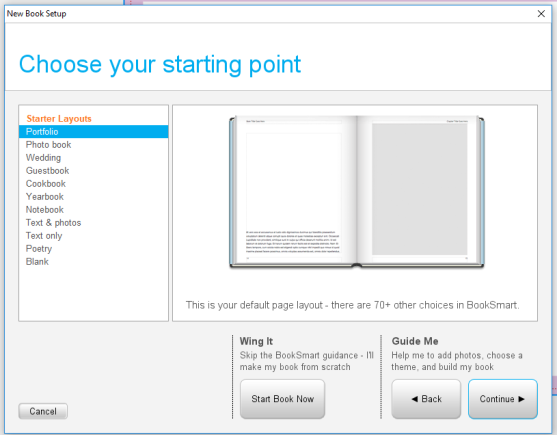
Next step lets you pick an already existing layout or start your book from scratch. I clicked on Start Book Now. This opens-up the editing software on the front page of the cover with information you added at the beginning and this is where you can change it.
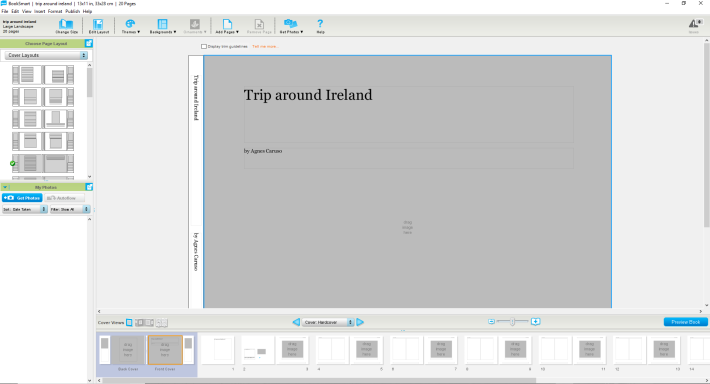
On the bottom of the screen is a book navigator. There are two ways of navigating, one on the arrows and the second on clicking the pages you want to edit. Pages can be moved around the book by dragging and dropping them in a new position. New pages can be added from the Add Pages drop down menu. The center of the window is occupied by the book pages. On the left there are alternative layouts and below space for images.

Importing images is not complicated, as long as you know where they are on your computer. Select Get Photos and identify your folder. There you can pick individual photos or import all of them. You can delete any unused images from the import list to clean it up.
As you have noticed the pages of the book show image sections and text sections. The easiest way to make a change to the layout is by choosing a different page layout from the variety of ones already available in the program. If none of them suits you, click on Edit layout and save it as your own with a new name.
Editing the layout is very simple. You can add Image Box, Text Box, resize, duplicate existing containers, bring them to front or send them to the back. The features can be aligned with respect to each other. An important note is that a Display trim guidelines feature should be enabled so no text or image will be layout in a pink area that will be later trimmed.
Now you should be able to make your own layouts and save them so they can be re-used later in your next project.
To Add images to the book, click on the page in book navigator. Once it is highlighted, you can drag the image to the image container. In order to substitute an image, delete it by using backspace and drag a new photo into its place. It is also possible to focus on a part of the image by using Zoom slider. By dragging the image in the container you can select to show just a part of the photo. When adding text, it is better to use a slightly smaller font than you would use in your regular documents. I have usually used 11 point font for main text. Another word of warning, not all fonts are licensed for e-books. At the top of the font palette there are e-book friendly fonts, however, for just printed version you can use any font. There will be time later to proof read a .pdf file to make sure that font is not too large.


It is time to stop now to let you create a book. In the next part we will finish the book and upload it to Blurb. Feel free to ask questions in the comments if you have any.
